


Correct knife positioning and cutting are some of the first precision skills learnt in professional culinary school. They are the backbone of an impeccable dish, giving optimum flavor and aesthetics. The right hold results in the right cut which in turn, ensures evenly cooked ingredients that enhance the dish’s overall flavor profile.
There is no greater example of what the finest knife skills can achieve than in Japanese cooking. World-renowned sushi and sashimi chefs produce some of the most beautiful and delectable dishes with knife skills passed down from generations of master chefs.
While it takes years of practice to develop knife skills to such standards, there are still many techniques you can master to create dishes worthy of acclaim. This article illustrates correct knife-holding techniques plus outlines proper knife safety including essential knife maintenance.
Positioning Your Hand To Hold a Knife Correctly
There are two techniques involved in the right knife grip and both equally important:
1. The cutting hand
The cutting hand is responsible for the knife movement, and exerting the optimum pressure for each cut. This is normally the chef’s predominate hand, but this is not necessarily the case with all chefs, who may change hands depending on the specific task.
2. The guiding hand
The guiding hand holds the food steady thus plays a vital supporting role. The guiding hand is also involved in the vast majority of accidental injuries so it is imperative you pay close attention to your hand positioning when holding your knife.
How to position your knife-holding hand:
- Clasp the knife placing your thumb around the top of the blade
- Wrap the remainder of your hand around the knife’s bolster
- Rest your index finger on the blade on the side opposite to your thumb
- Curl the remaining fingers loosely around the handle
- Focus your grip primarily on the thumb and forefinger
- Should your grip focus on the entire handle of the knife, relax your remaining fingers (excluding thumb and forefinger).
- Practice as much as possible. By doing this, you will soon discover this grip not only gives you ultimate knife-wielding control but that any other hold feels uncomfortable.
How to position your guiding hand:
Note: below is a depiction of the most common chef hold for the guiding hand – the ‘claw grip’. There are a number of variations on this grip but this one is used by many professionals. There are a number of other grip holds too but for brevity’s sake, this article covers the most common.
- Make a claw shape with your guiding hand, curling your fingers inwards
- Keeping this shape, rest your fingertips on the food item (effectively creating a ‘shield’ from the knife)
- Position your thumb low down on the food – this aids grip and stability
- Depending on the size of the food item, rest your wrist on your cutting board for added control
- Rest the knife against your knuckles, not your fingertips as you slice
- After each cut, walk your fingers back slightly across the food item
Positioning Your Knife for Different Types of Cuts
While the claw grip can be applied to most cutting jobs, which slice you perform is dependent upon the type of food being prepared. It is crucial you consider the type of dish and cut of meat when choosing which knife cut to use, positioning your hand and blade accordingly.Before highlighting individual cuts and matching them up to certain foods, here are some general positioning tips:
- Always slice away from your hand – if the blade slips it is less likely to cut you.
- Create a stable food base – even up odd-shaped small vegetables like carrots or rounded large root vegetables like onions by slicing a thin segment off the top or bottom.
- Choose the correct knife for the job - i.e a chef’s or Santoku knife for meat, a paring knife for peeling small vegetables and so on.
- Use the right part of the knife when cutting – for example, when chopping use the back half of blade whereas when trimming meat, use the front section.
The most common knife cuts
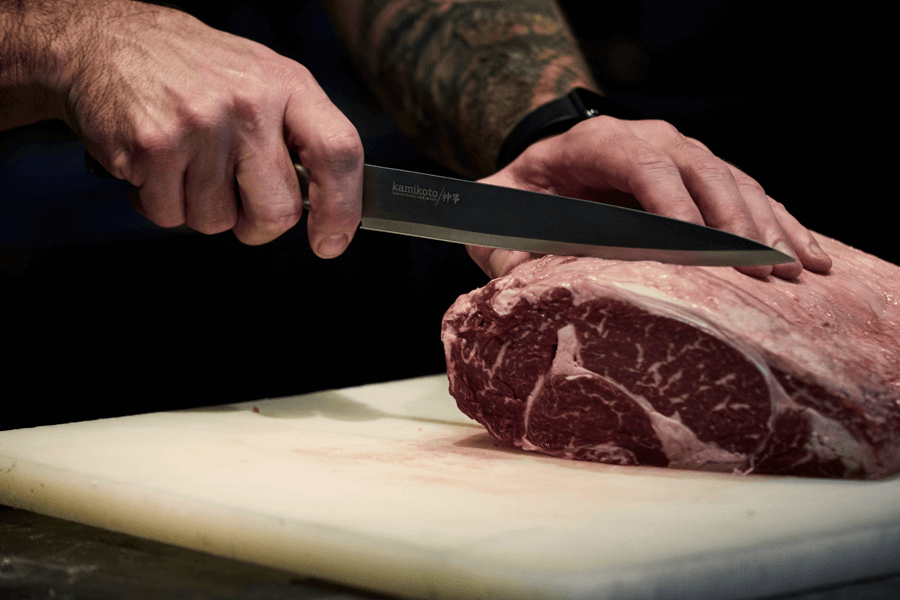
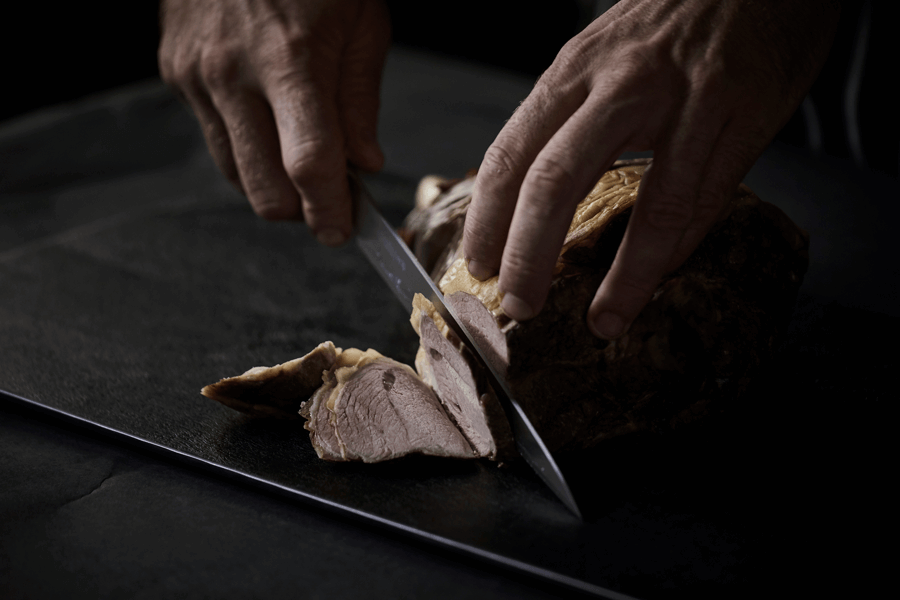
1. Slice
A versatile cut creating anything from even, wafer-thin slices - such as those found in Japanese cooking - to chunks of large vegetables or boneless meat.Best for:
- Boneless chicken, beef, lamb or pork plus small and large vegetables and fruits
- Sizing depends on dish – ie fine slices for stir fries
- Position your hands as detailed above (cutting hand and claw grip for guiding hand)
- Ensure the food item is stable, cutting it in half or as required to create a flat surface.
- Position the knife tip against the cutting board with the rest of the knife angled upwards, the flat side grazing your knuckles.
- Keep the blade tip in contact with the board, raise the rest of the knife and slice into the food.
- Continue this up and downwards motion, using the full length of the blade to slice through the food.
2. Chop
This is a variation of the slice cut which allows you to refine it further into dice and intricate culinary cuts such as julienne, brunoise and batonnet. This method is best used for precision cutting of smaller vegetables like carrot or celery using a 7-inch Santoku Genten knife.Best for:
- Boneless chicken, beef, lamb or pork plus small and large vegetables such as broccoli or carrot
- Sizing depends on dish – large chunks for curries, casseroles, stews etc, fine dice for consommé
- Position your hands as detailed above (cutting hand and claw grip for guiding hand)
- Ensure the food item is stable, cutting it in half or as required to create a flat surface.
- Place the blade tip on the cutting board. Keep the tip on constant contact with the board.
- Raise the rest of the knife upwards and slice into the food using in an ‘up and down’ rolling motion.
- Continue this up and down rolling motion, using the full length of the blade to slice through the food.
3. Mince
This cut is best used to mince herbs and boneless meat such as chicken, pork and beef. The guiding hand plays a pivotal role in supporting the knife rather than holding the food in this cut.Best for:
- Boneless chicken, beef, lamb or pork plus herbs
- Sizing depends on dish – rough mince for Bolognese or fine mince for Steak Tartare
- Position the food in the center of the chopping board in a mound or heap
- Position your cutting hand as mentioned previously
- Position your guiding hand fingertips flat on the top of the blade tip
- Place the blade tip on the cutting board.
- Rock the blade up and down while keep the tip stabilized on the chopping board.
- Continue this motion cutting across the food item and creating a mince to your desired size and texture.
4. Lever
Strength must be employed here but it is also important your knife is very sharp to avoid exerting so much pressure that you cause an accidental slip and injury.Best for:
- Large vegetables and fruit such as pumpkin or melon
- Sizing depends on dish
- Ensure the food is secured in a stable position on your board. Even it up by slicing a small piece off the top or bottom first
- Position your cutting hand as mentioned previously
- Position your guiding hand’s palm flat on the top of the knife spine towards the tip with fingertips splayed outwards to avoid injury
- Point the blade tip towards the food, raise the remainder of the knife upwards.
- Push down with both hands in one cut with firm pressure to slice through item. Remember to keep your fingertips splayed and your palm firm upon the knife’s spine.
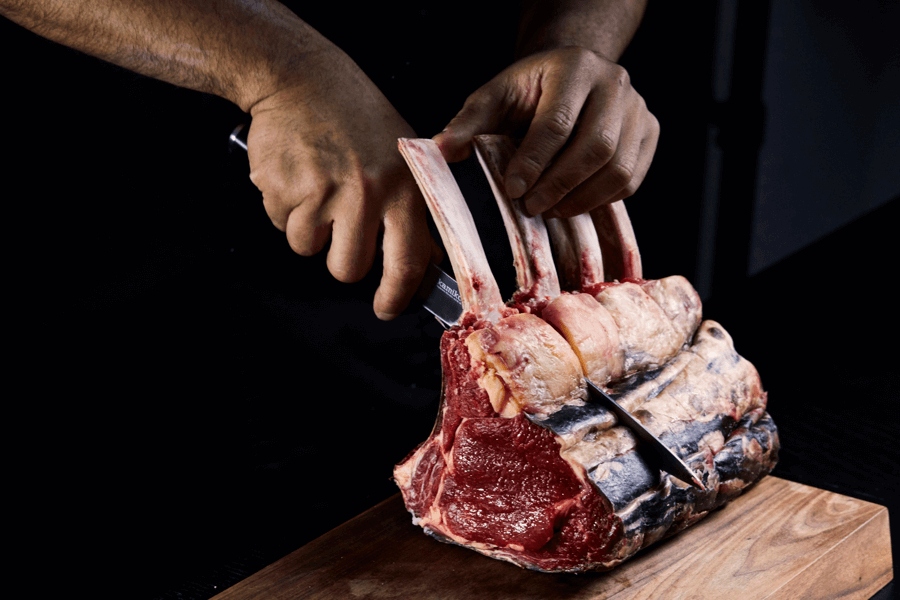
How to cut meat with bones
Boned cuts of meat such as prime beef rib roast, baby back pork ribs or a whole side of beef or chicken require different techniques and knife skills such as deboning or butterflying. Ensure you use the proper knife when employing such techniques and consider protective equipment. For example, many professional chefs use a chain-link apron and glove on the non-knife hand.
General Safety Tips for Knives
- Keep them sharp – dull knives cause more injuries than sharp ones
- Always use the right knife for the particular job and food type
- Use a wooden chopping board as other forms – such as glass - dull knife blades
- Secure your cutting board with a damp tea towel underneath to avoid slippage
- Never use your palm as a stabilizing surface for cutting
- Handle knives carefully when washing
- Store knives securely after use – in a wooden block or container
- Ensure all employees are trained appropriately in knife safety, usage and sharpening
Essential Knife Maintenance
For premium safety, understanding and perfecting the right hand hold when cutting must work in conjunction with the right care and storage of your knives. Here are some procedures to follow in relation to this:
Cleaning Your Knives Safely
Rinse the knife regularly with hot water as you cook to remove food buildup.Do not pile knives in a sink of soapy water. Wash each one individually.
Keep the blade pointed away from you when cleaning.
Using a dishcloth, clean from the spine side wiping down the full length of the blade.
Rinse and wipe dry using the same wiping method as for cleaning.
Store safely in a wooden container or box.
Note: do not use a dishwasher or scouring cloth to clean knives as they are too abrasive.
Sharpening Your Knives
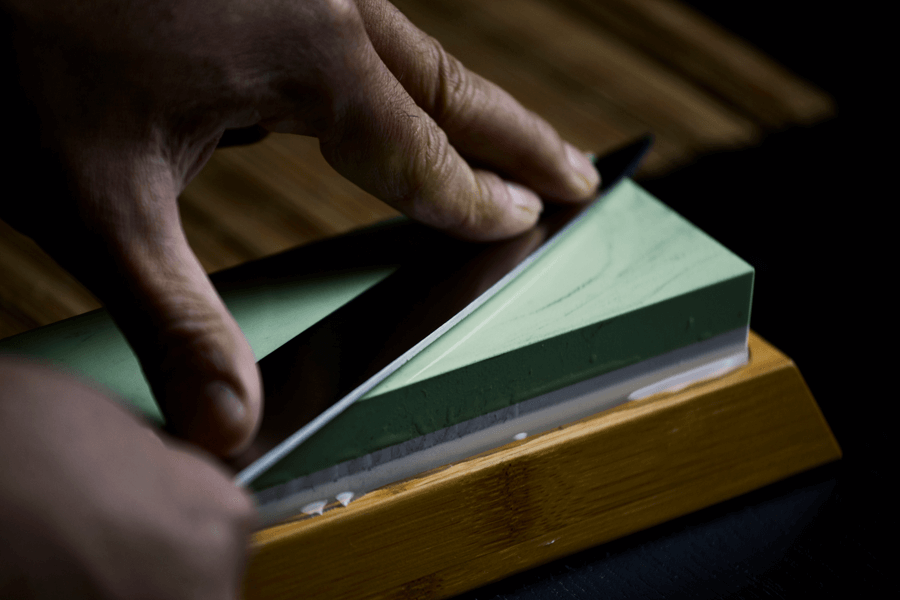
As previously mentioned, dull knives cause a great number of injuries in the kitchen. Keeping them sharp avoids the need for excessive force and accidental spillages. One way to check if a knife needs sharpening is by slicing through a sheet of paper. If it easily performs this task, it is sharp enough.
There are a number of ways to clean knives but the most superior method is by using a sharpening whetstone. It gives a much sharper knife edge than other methods.
Whetstone sharpening process
- Soak whetstone in water
- Turn it to the coarse side and hold the knife at the correct angle (for Japanese blades between 10-15 degrees, for European blades 15 to 20 degrees)
- Glide the knife up and down the stone in a smooth motion
- Cover the entire blade
- If the knife is double-beveled, repeat process on other side of the blade
- Turn the stone to the fine side and repeat the same process
Replacing Your Knives
The right set of high-grade quality knives - such as the Kanpeki Knife Set – should last a lifetime with proper care and sharpening maintenance. But there are a number of instances where replacement of a knife is warranted.They are:
- a broken tip or handle
- a bend in the blade
- a large chip in the blade (smaller ones can be smoothed out)
- loose handle rivets (metal rounds that secure the metal to the handle)
- it is no longer comfortable to use which could be for a variety of reasons, for example the handle is worn (which is often a product of cheaper knives)